

If you haven’t already done so, please check out the first part of this article for background on this archetype, the history of Hermit Druid, and the significance of the Gatecrash Hermit Druid variants. In this article, I will explore the design potential of a Legacy version of this archetype.
Understanding The Plan
This archetype is premised on a very simple, yet incredibly powerful and compelling idea: that you can win the game on turn 1 in Legacy for just 4 mana, and that Gatecrash provides the tools to support a relatively consistent way to do that. Therefore, this archetype pursues a simple strategic objective: generate 4 mana, cast Balustrade Spy or Undercity Informer, and do this as quickly as possible, preferably on turn 1.
This simple strategic goal has three elements, each of which contains hidden subtleties:
1) Generate four mana.
Generating four mana is usually simple for most decks, but the trick with this deck is that you have to do it on turn one! That’s a far more challenging objective, and it’s especially difficult to do when you have to do it without any land. It’s nonetheless entirely conceivable. Speed combo like Goblin Belcher decks are premised on generating 7 mana (often with the help of Lion’s Eye Diamond). If Belcher decks can do it, surely this deck can as well.
2) Cast Balustrade Spy or Undercity Informer.
This may seem simple enough, but it means that you have to have one of these cards in hand. Having just eight of these creatures, while more than was the case for Hermit Druid decks, is insufficient to consistently and reliably have one in your opening hand every game. You will need either additional win conditions or additional ways to find them.
3) Do this quickly.
Speed in Magic is a function of both mana production and card availability. Decks that rely entirely on lands for mana production are limited by the one-land-per-turn rule to generate only one additional mana each turn of the game. Decks that use special lands, like Mishra’s Workshop or Ancient Tomb, can generate more mana per turn, depending on access to such cards in a given format.
Decks that use mana accelerants are not bound by the one-land-per-turn limit to generate mana or the availability of fast mana lands, but are bound by the number of these accelerants they can draw at any point in time. If a player starts the game with their deck in their hand, they could presumably play all of their fast mana accelerants at once. But starting with an opening hand of 7 cards is far more constraining.
That said, in Legacy it should be possible, although difficult, given the available mana accelerants, to generate upwards of 4 mana on turn one consistently, especially for a deck with no lands. A deck with no lands is inherently unbound by the one-land-per-turn rule as constraining mana production.
The goal is to generate 4 mana and cast one of the Rogue Hermits on turn one. Once that occurs, a chain reaction of triggers and effects begins that ultimately results in victory. I will explain how below. For the moment, and for the brevity of this narrative, please accept that this is so.
These elements are necessary to win games, but not sufficient. Winning tournament matches will require more, and will require finding ways to resolve your Hermit, protect your win condition package from disruption, and address your opponent’s other countermeasures, such as graveyard hate. I will address each of these in time.
The Two Bottlenecks
Before turning to these matters and discussing and evaluating design options, you must understand at something about this archetype at the most general level. This deck has two bottlenecks that must be confronted at the outset. Any approach at building a consistent Rogue Hermit list must address these bottlenecks:
1) Balustrade Spy, Undercity Informer, or a way to find one must be present.
2) A source of black mana on turn one that is either free or can be generated from another color source (in order to cast your Spy or Informer).
If you do not understand these bottlenecks, you will not understand this deck. In building any Rogue Hermit deck, any hand without either one of these elements is an auto-mulligan. If you do not have a combo creature in hand, or a way to find one, your hand cannot be kept. It cannot fulfill the objectives described at the outset for satisfying your strategic objective.
Similarly, if you do not have a free source of black mana or a way to turn another colored mana into black, you cannot cast one of your combo creatures on turn one. Therefore, for the vast majority of versions of this deck, one of the most important bottlenecks is a consistent source of early black mana. A Dark Ritual does not count.
To illustrate this idea, consider this opening hand:
Elvish Spirit Guide
Simian Spirit Guide
Dark Ritual
Cabal Ritual
Balustrade Spy
Undercity Informer
Pact of Negation
This hand looks fantastic, except for one simple fact: there is no way to cast Balustrade Spy or Undercity Informer because you lack an initial source of black mana. Any design approach must pay particular attention and special sensitivity to these two areas of concern.
Design Options
I will now turn these requirements into design options. Any Rogue Hermit decklist will be composed entirely of three elements: 1) Win Condition Packages, 2) Mana Sources, and 3) Disruption. With this view of your design needs, it is easy to identify possible options. I will canvass all of the options available under these three categories, and describe them.
1) Win Condition Packages
This includes the Rogue Hermits, ways to find the Rogue Hermits, and packages of cards that are used once one of the Rogue Hermit’s have been activated. This also includes alternative win conditions.
Here’s a comprehensive list. I will then explain some of the packages.
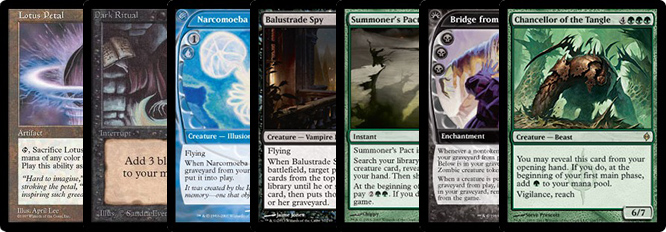
Undercity Informer
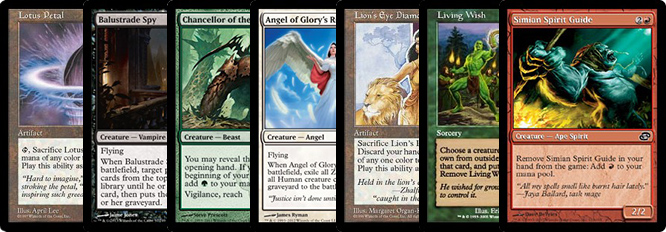
Balustrade Spy
Living Wish
Narcomoeba
Bridge from Below
Dread Return
Angel of Glory’s Rise
Fiend Hunter
Elvish Visionary
Alchemist’s Apprentice
Laboratory Maniac
Sutured Ghoul
Dragon’s Breath
The Mimeoplasm
Lord of Extinction
Giant Solifuge
Azami, Lady of Scrolls
Phantasmagorian
Tendrils of Agony
Goblin Charbelcher
Empty the Warrens
Storm Entity
There are three basic Dread Return packages to go with the Rogue Hermits, and then a bunch of other alternate paths to victory (Empty the Warrens, Belcher, etc).
The three main Dread Return Packages are as follows:
Angel of Glory’s Rise + Laboratory Maniac + Azami, Lady of the Scrolls
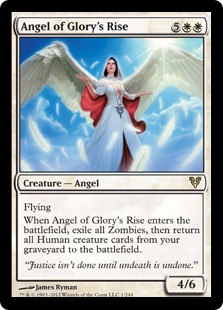 Once you have milled your deck, you sacrifice Bridge from Below tokens and Narcomoebas to cast Dread Return on Angel of Glory’s Rise, which puts all Humans into play, including Laboratory Maniac and Azami, but Undercity Informer and Wild Cantors as well. You simply use Azami to draw a card to trigger Maniac to win the game. You can also use Alchemist’s Apprentice in the Azami slot, although Azami is superior since it defeats a Stifle because you can activate another Human using Azami in response to win the game.
There is a very cool variant on this one:
Angel of Glory’s Rise + Undercity Informer + Wild Cantor + Fiend Hunter
Angel of Glory’s Rise brings Undercity Informer, Wild Cantor, and Fiend Hunter into play. Target Angel of Glory’s Rise with Fiend Hunter. Sacrifice Wild Cantor to generate a mana to sacrifice Fiend Hunter to Undercity Informer to mill your opponent. When Angel comes back into play, return Fiend Hunter to play. Repeat this loop until your opponent is decked.
Sutured Ghoul + Dragon’s Breath
You have more than enough creatures in your deck to make this kill lethal, but it is by far the most vulnerable. It not only loses to everything that the other kills lose to, but it also loses to most spot removal as well as Maze of Ith, and is not recommended.
The Mimeoplasm + Lord of Extinction + Giant Solifuge
Lord of Extinction gives The Mimeoplasm a huge body, and Giant Solifuge gives it haste, trample, and shroud. It’s similar to the Sutured Ghoul kill, and similarly disruptable in that it can’t beat things like Moat, Elephant Grass, Ensnaring Bridge, etc.
I strongly prefer the Angel of Glory’s Rise packages because of their resilience and flexibility.
2) Mana Sources
This is all of the mana acceleration you need to cast the Rogue Hermits. Here is a comprehensive list of options:
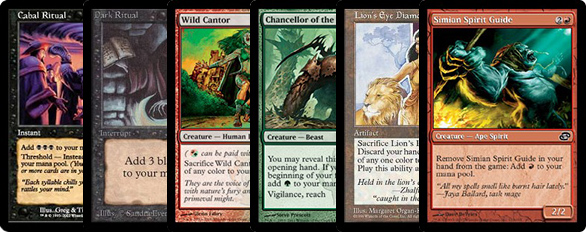
Lion’s Eye Diamond
Chrome Mox
Mox Opal
Grim Monolith
Land Grant
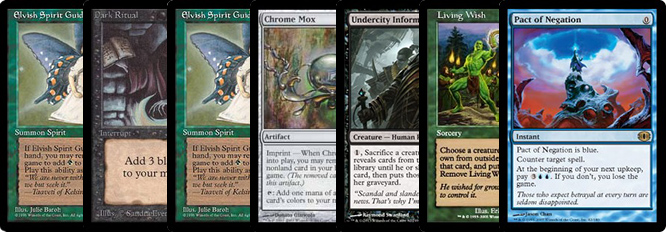
Elvish Spirit Guide
Chancellor of the Tangle
Summoner’s Pact
Living Wish (for lands)
Tinder Wall
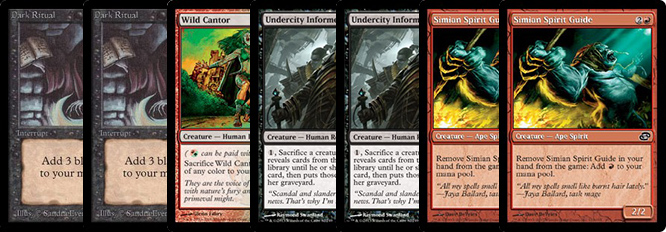
Dark Ritual
Cabal Ritual
Culling the Weak
Rite of Flame
Desperate Ritual
Pyretic Ritual
Seething Song
Simian Spirit Guide
Manamorphose
Chromatic Sphere
Chromatic Star
Barbed Sextant
Wild Cantor
Blood Pet
Priest of Gix
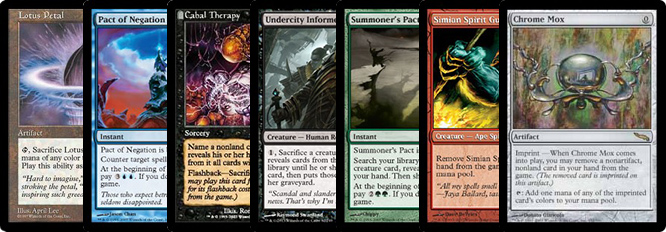
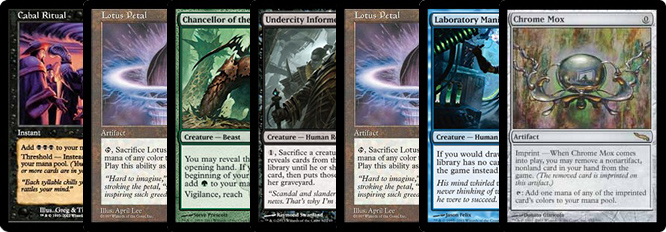
Any mana source that can unconditionally generate one mana for one card no mana cost is an automatic inclusion in any Legacy Rogue Hermit list. There are only a small set of cards that can do this: Lotus Petal and the Spirit Guides.
3) Disruption
This includes all of the cards you need to resolve your combo creature and protect the win condition package. Here are some relevant options:
Pact of Negation
Cabal Therapy
Duress
Thoughtseize
Unmask
Leyline of the Lifeforce
Leyline of Sanctity
Leyline of the Void
Leyline of Anticipation
Chancellor of the Annex
Force of Will
Misdirection
Spell Pierce
Flusterstorm
Mindbreak Trap
Disrupting Shoal
Guttural Response
Red Elemental Blast
Pyroblast
Nature’s Claim
Shattering Spree
Ingot Chewer
Ancient Grudge
Contagion
Darkblast
Living Wish for (Bojuka Bog, Karakas, etc.)
With this comprehensive list of options available, we can now build a better Rogue Hermit list.
Building a Better Rogue Hermit
7 Balustrade Spy & Undercity Informer
Given what has been covered so far, it is a given that any Legacy Rogue Hermit list will begin with at least 7 of these creatures maindeck. Whether the 8th is played maindeck depends on whether we decide to include Living Wish or not.
53 card slots left.
4 Chrome Mox & 4 Lotus Petal
Zero casting cost black mana being the other critical bottleneck, it follows as a matter of course that any list will run maximum amounts of these artifact accelerants. These are the most reliable sources of black. Neither is superior to the other, although both are sometimes situationally better than the other. Chrome Mox is better in some situations, especially when you need a reusable source of mana (such as to activate Undercity Informer on turn 2, or to play another creature because your first has been countered).
45 card slots left.
4 Dark Ritual
Dark Ritual performs a very important and unique function. It is the only unconditional mana source that nets more than one mana. It is in essence, a 2-for-1. Whereas Spirit Guides and Lotus Petal only give you one mana for one card, this gives you two mana for one card. This is important because Dark Ritual allows you to generate 4 mana from just three cards.
41 card slots left.
4 Elvish Spirit Guide & 4 Simian Spirit Guide
While Dark Ritual is unique, in that it nets two mana for one card, the Spirit Guides are almost as unique, as they are among a very unique class of legal cards in Legacy that unconditionally provides 1 mana for 1 card at no mana cost. All of the cards in that class are virtually automatic inclusions in any Legacy version of this archetype. After all, the critical goal is to generate 4 mana on turn one. That makes the Spirit Guides among the most important mana accelerants.
33 card slots left.
4 Summoner’s Pact & 1 Wild Cantor
Summoner’s Pact serves two basic roles. First, it is a de facto Elvish Spirit Guide, since it can find one for no mana. Second, it helps alleviate one of the bottlenecks: it finds Wild Cantor, which translates red or green mana into black mana.
Wild Cantor is a shockingly important in this deck. Imagine you have a hand like this:
Elvish Spirit Guide
Simian Spirit Guide
Summoner’s Pact
Dark Ritual
Balustrade Spy
Pact of Negation
Pact of Negation
You should already see the role that Wild Cantor plays from this hand. Summoner’s Pact finds the Wild Cantor, which allows you to play the Dark Ritual. Summoner’s Pact and Wild Cantor basically explodes one of the key bottlenecks in this deck. But it does so for a price. Summoner’s Pact cannot and should not be used with abandon. For if you do not win, you will have no opportunity to come back – unless you can pay the Summoner’s Pact upkeep cost.
28 card slots left.
4 Chancellor of the Tangle
This card is a more limited, but not strictly inferior, Elvish Spirit Guide. It is one of the few cards in the format that offers 1 mana for 1 card. Although it can only generate this mana on turn one it has a surprisingly number of advantages. One of my favorite plays with Chancellor is to generate a mana, and then imprint it on a Chrome Mox. You can then use it to play, say, Living Wish or cast a combo creature.
24 card slots left.
4 Cabal Ritual
Cabal Ritual only nets one mana in virtually every relevant situation in this deck. But what makes it better than Grim Monolith or Pyretic Ritual? The fact that it’s black. Because it’s black, it can do two important things. First, it can be imprinted on a Chrome Mox, and satisfy the critical zero casting cost black bottleneck. Notice how few cards in the deck so far are black. Cabal Ritual will be one of the most imprinted cards on Chrome Mox. Second, because it’s black it can cast one of your Rogue Hermits. That makes it better than Grim Monolith, Pyretic Ritual, or any similarly available spell.
20 card slots left.
3 Narcomoeba
2 Bridge from Below
1 Dread Return
1 Angel of Glory’s Rise
1 Azami, Lady of Scrolls
1 Laboratory Maniac
This is my preferred kill package, and the same package I run in Vintage. This package wins the game by playing Dread Return onto Angel of Glory’s Rise, which puts Azami and Maniac into play. Then tap Azami to win the game by triggering Maniac with an empty library.
This 9 card package takes up a huge amount of space in the deck, but it’s all necessary.
I prefer 3 Narcomoeba and 2 Bridge from Below rather than 4 Narcomoeba and 1 Bridge from Below for several reasons. First, it generates more tokens, which I can use to flashback Cabal Therapies before using Dread Return. Second, a Bridge in hand is better than a Narcomoeba in hand, since I can imprint a Bridge on a Chrome Mox to generate necessary black mana.
While the Fiend Hunter kill is slight more compact, it won’t win any against Emrakul decks, and there are too many of them in Legacy to justify Fiend Hunter.
11 card slots left.
2 Cabal Therapy
Given the win condition package I’ve settled on, Cabal Therapy is a natural inclusion. It can be played from the hand or from the graveyard to clear the way for a victorious ending. It also serves a critical secondary function, which is to strip combo parts from your hand into the graveyard zone. While 2 Cabal Therapies are mandatory, there is a case to be made for running more.
9 card slots left.
 4 Living Wish & 0 Lion’s Eye Diamond
This was the issue that took me the longest amount of time to work out. There was an intractable dilemma.
I worked doggedly on a 0 Living Wish build, but I simply could not make it consistent enough. The huge upside of the 0 Living Wish build is that it could run 4 Pact of Negation as disruption. If you run Living Wish, it is intuitive to run Lion’s Eye Diamond. Here’s the dilemma: if you run LED, you can’t protect your Living Wish for a Rogue Hermit with Pact. This is the Gordian knot I had to cut through.
Lion’s Eye Diamond does many things: It can activate an Undercity Informer, it can pay for a Pact of Negation or Summoner’s Pact, but above all, it’s there to generate mana post-Living Wish. You cast Living Wish, and respond by sacrificing Lion’s Eye Diamond to use it like a Black Lotus to cast your Wished-for-card.
For several days I kept turning over this dilemma in my mind: how do I cut this knot? How do I solve this problem? Living Wish makes the deck more consistent in every respect: it not only solves the first bottleneck by increasing the number of Rogue Hermits you have access to, it can also turn green mana into black by fetching Ebon Stronghold, Swamp, City of Brass, or Cavern of Souls.
The ultimate solution I came to has been the one that has worked best: put Lion’s Eye Diamond in the sideboard. I haven’t looked back.
5 card slots left.
4 Pact of Negation
Given the options, Pact of Negation is the absolute best disruption spell we can run maindeck after Cabal Therapy. It costs no mana and just one card to protect your win condition. It gives this deck a good chance to overcome an opponent’s turn one Force of Will and other countermagic.
1 card slot remaining.
1 Lion’s Eye Diamond
After the LED/Living Wish/Pact dilemma, this was the next most difficult choice. I could put so many different cards in this slot: a 2nd Wild Cantor, Lion’s Eye Diamond, Grim Monolith, a 3rd Cabal Therapy, and on and on.
Grim Monolith is particularly useful as a mana source, and worthwhile in this kind of list. It’s a turn one play that easily supports a turn two victory.
A 2nd Wild Cantor is also a serious consideration. If you want to imprint your first Wild Cantor onto a Chrome Mox, it’s very important to have a second one in the deck, especially if you want the Fiend Hunter kill, which requires Wild Cantor to work. Wild Cantor is also the best card to sacrifice to a pre-combo Cabal Therapy.
A 3rd Cabal Therapy is attractive for a similar reason. You can imprint it on a Chrome Mox if it’s in your opening hand, and use it pre-combo to help clear the way.
Ultimately, however, I think a single Lion’s Eye Diamond is the best use of this slot. Here are its merits:
– Can be used to activate Undercity Informer once it’s been played and protected by Pact.
– Can be used in hands without Pact to generate mana with Living Wish.
– Is better post-board in conjunction with Goblin Belchers. You can protect a Belcher with Pact, and use LED to activate it.
Ultimately, you’ll want 4 LEDs between the maindeck and sideboard, so, in the end, I felt having 1 LED maindeck was better than the 2nd Wild Cantor.
0 Manamorphose & Gitaxian Probe
I think any Legacy list with these cards is incorrectly built. This deck is the opposite of the Storm decks or Belcher decks: you don’t really care about thinning, and you don’t actually want to see cards that aren’t in your opening hand, because they essentially become unknown variables. As long as your hand has 4 mana, a Hermit or way to find one, you don’t actually want to draw more cards because you risk putting combo pieces in your hand. Red flag any list with these as incorrectly built.
Building the Sideboard
1 Undercity Informer
Mandatory Living Wish target. I prefer Informer here over Balustrade Spy because it’s less expensive, so it is more likely you can do both Wish and Spy on the same turn.
1 Fiend Hunter
Optional slot to reduce the space allotted for the combo kill for decks that don’t run Emrakul. You can bring in a Lion’s Eye Diamond in that spot.
1 Cavern of Souls
Mandatory Living Wish target to make your Hermits uncounterable.
1 Ebon Stronghold
This is a necessary Living Wish target since it translates green mana into black (one of the bottlenecks) without any diminution in your mana supply.
1 City of Traitors
Similar to Ebon Stronghold, but usable immediately for 2 mana, and reusable thereafter. It’s situationally better than Ebon Stronghold. For example, a hand where you have the mana to cast Living Wish, this, a Chrome Mox (imprinted with a black card), and an Undercity Informer. You can use the City of Traitors now and next turn.
1 City of Brass
In testing, I wanted City of Brass more than a Bayou. I found myself needing black for Cabal Therapy and the Rogue Hermits, green/red for Wild Cantor and other Living Wishes, and red for hard casting Simian Spirit Guides. City of Brass also opens up the sideboard more. A Bayou could be run in this slot, though.
1 Gilded Drake or 1 Karakas
Can provide an out against a fast Show and Tell.
1 Thrun, the Last Troll
For a very grindy game against a heavy control deck. This has not been heavily tested and may not be necessary. Would probably only use if you used LED to get it.
4 Goblin Charbelcher
The perfect answer for the person who brings in tons of graveyard hate.
3 Lion’s Eye Diamond
Used to activate Belcher, and to help accelerate your combo against decks that don’t have countermagic.
0 Leyline of the Lifeforce
Leyline of the Lifeforce is very useful because it makes your combo creatures uncounterable. With Leyline of the Lifeforce in play, the game shifts to countering your mana sources, which are more abundant than your combo creatures. The problem is that in the Living Wish builds, Leyline of the Lifeforce is much less useful since it can’t protect Living Wish.
0 Chancellor of the Annex
While a brilliant idea, I do not think this card is good enough. There are, with this list, too many turn two victories and too many situations where it’s irrelevant. For example, an opponent can play a land and still cast Force of Will through Chancellor. Worth considering, but ultimately not worth it, in my view.
Which brings me to my final decklist:
Legacy Rogue Hermit, by Stephen Menendian
I have been very happy with this deck in testing. So much so that I’m increasingly convinced that the Living Wish package may be the optimal route in Vintage as well. It not only increases consistency, but provides resilience and situational flexibility.
10 Goldfishes
As I did in the Vintage article, I will examine 10 opening hand goldfishes with this deck for your benefit, to observe how the deck plays out in a general matter, from mana sequencing to the finisher. The following ten games are not contrived in any way. I recorded the first ten games of goldfishing without any specific expectations. I will analyze and review the results later.
Game 1:
This hand is capable of generating 4 mana on turn one, but not casting Undercity Informer and using it at the same time. This hand is tricky, and there are many ways to play it. I think the best way to play this hand is to go for a turn two kill.
I would do this:
1) Play Chrome Mox, imprinting Elvish Spirit Guide
2) Remove Elvish Spirit Guide from game to generate G mana.
3) Tap Chrome Mox to cast Living Wish for Ebon Stronghold.
4) Pass the turn.
5) On turn two, tap and sacrifice Ebon Stronghold to cast Dark Ritual.
6) Tap Chrome Mox. Cast Undercity Informer with BB floating.
7) Pay a mana if they try to Daze it.
8) Play Pact of Negation if they try to counter Informer.
9) Sacrifice Informer to empty your library into your graveyard.
10) Put three Narcomoebas into play.
11) Cabal Therapy your opponent twice from the graveyard with flashback, generating zombie tokens from the Bridge from Below triggers.
12) Cast Dread Return on Angel of Glory’s Rise, returning all Humans to play.
13) Tap Azami to win the game by triggering Laboratory Maniac’s win condition.
A turn 2 goldfish with Pact protection.
Game 2:

This hand is simple:
1) Play Summoner’s Pact finding Elvish Spirit Guide
2) Play Summoner’s Pact finding Wild Cantor.
3) Remove Elvish Spirit Guide from Game to generate G mana.
4) Cast Wild Cantor.
5) Sacrifice Wild Cantor for black mana.
6) Cast Dark Ritual.
7) Remove Simian Spirit Guide to generate R.
8) Cast Balustrade Spy.
9) Repeat steps 10-13 from game 1.
10) Protect any of these steps with Pact of Negation
A turn 1 goldfish with Pact protection.
Game 3:
1) Remove Simian Spirit Guide from game to generate R.
2) Cast Wild Cantor.
3) Sacrifice Wild Cantor to cast Dark Ritual
4) Remove Simian Spirit Guide from game to generate R.
5) Cast Undercity Informer, and activate it.
6) Repeat steps 10-13 from game 1.
Another turn 1 goldfish.
Game 4:
1) Play Chrome Mox, imprinting Bridge From Below.
2) Cast both Summoner’s Pacts for Elvish Spirit Guides.
3) Exile all three Elvish Spirit Guide from game to generate GGG.
4) Tap Chrome Mox and cast Balustrade Spy.
5) Repeat steps 10-13 from game 1.
A turn 1 goldfish.
Game 5:
This hand is a mulligan, although not necessarily an automatic mulligan. It has 4 mana on turn one, but it needs 6. It can play a turn one Living Wish, but will only have 2 mana to cast Undercity Informer. That means it needs at least one and likely two or three more draws to be able to win the game. A hand of six has a better shot of accomplishing that goal. I mulliganed into:
That’s an automatic mulligan: 3 combo parts in hand, two green mana, and no combo creature or way to find one. I mulliganed into:
This hand is one mana away from winning the game. The next card drawn for the turn is Elvish Spirit Guide. On turn two, you:
1) Play Chrome Mox, imprinting Cabal Therapy.
2) Play Lotus Petal.
3) Cast Cabal Ritual.
4) Remove Elvish Spirit Guide from the game to make G.
5) Cast Balustrade Spy.
6) Repeat steps 10-13 from game 1.
A turn 2 goldfish after a mulligan to 5.
Game 6:
1) Reveal Chancellor to add G to your mana pool.
2) Cast Lotus Petal.
3) Cast Dark Ritual.
4) Cast Balustrade Spy
5) Repeat steps 10-13 from game 1.
Another turn 1 goldfish.
Game 7:

There’s no win condition in hand, so I mulligan into:
This hand also lacks any combo part. I mulligan into:

This gets mulliganed into:
This hand is not capable of winning for a few turns, but it’s probably as good a hand as you’ll have for just 4 cards, so it’s a keeper.
Game 8:
This is the sequence to play:
1) Reveal Chancellor to add G to your mana pool.
2) Play Lotus Petal.
3) Exile Simian Spirit Guide to add R to your mana pool.
4) Play Lion’s Eye Diamond.
5) Cast Living Wish, and respond by sacrificing LED to add BBB to your mana pool.
6) Find Undercity Informer from your sideboard and cast it.
7) Activate it.
8) Repeat steps 10-13 from game 1, but take note you will Cabal Therapy yourself once to drop Angel of Glory’s Rise into your graveyard so it can be Dread Returned.
Another turn 1 goldfish.
Game 9:
1) Play Lotus Petal.
2) Play Chrome Mox, imprinting Cabal Therapy.
3) Cast Summoner’s Pact for Elvish Spirit Guide, and remove it from the game to add G to your mana pool.
4) Remove Simian Spirit Guide from the game to add R to your mana pool.
5) Cast Undercity Informer.
6) Activate it.
7) Cast Pact of Negation if necessary.
8) Repeat steps 10-13 of game 1.
A turn 1 goldfish with Pact of Negation protection.
Game 10:
1) Reveal Chancellor to add G to your mana pool.
2) Cast Chrome Mox, imprinting Cabal Ritual.
3) Play both Lotus Petals.
4) Cast Undercity Informer.
5) Activate it.
6) Repeat steps 10-13 of game 1, but take note you will Cabal Therapy yourself once to drop Laboratory Maniac into your graveyard so it can be returned to play with Angel of Glory’s Rise.
Yet another turn 1 goldfish.
Conclusion
Out of 10 games, that was 7 turn 1 goldfishes (half with Pact protection), 2 turn 2 goldfishes, and one mulligan to 4 with a turn 4 goldfish win.
I very much enjoy the existence of a deck like this in Legacy. I find it makes the format more interesting and exciting from both a play and strategic diversity standpoint.
It’s difficult to say, but I think its possible that Rogue Hermit may be stronger in Legacy than Vintage. The main reason for this is simple: the degree of relevant spells that matter, like Force of Will and Leyline of the Void, are far more prevalent in Vintage. It’s also possible that the Legacy version is more consistent due to having 4 Lotus Petals, for example.
I believe that Living Wish is necessary, at least for any Legacy list. It helps get around both of the key bottlenecks by translating green into black mana and increasing the quantity of Rogue Hermits, at least virtually.
Please note that any reader considering this for a tournament should thoroughly test this list, and consider any modifications and improvements. There is room for further refinement or improvement, although I am happy with this list for the time being.
Finally, I’d like to give credit to Nudon on The Source for developing what I believe to be the most advanced lists of this archetype I have seen thus far, and certainly influencing my views and choices with this archetype.
Until next time,
Stephen Menendian